Transcript
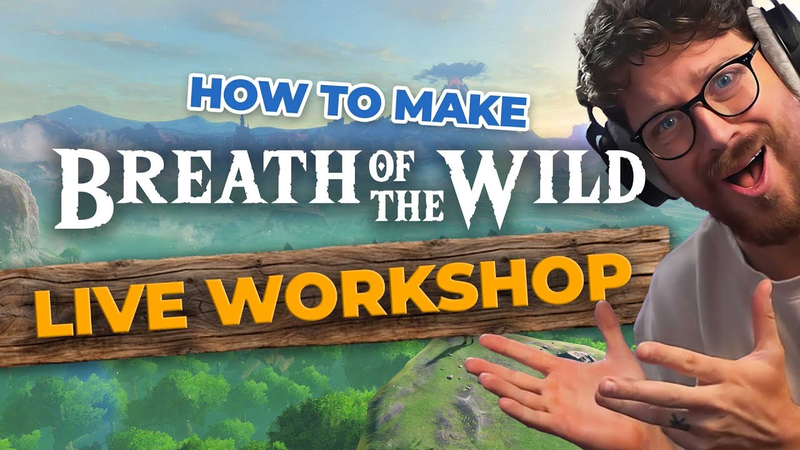
If you're anything like me and you want to make a game like Breath of the Wild, a stylized 3D adventure game, but you don't want to learn how to 3D model or well, you don't want to download, you know, expensive assets. You can actually recreate that look royalty-free. All the assets are linked below. I'm going to jump inside of Unity and show you how to do it. All right, so let's get the color scheme going, guys. Let's get the color scheme going. You can use whatever you want. I'm going to use Photoshop. So, the ground I'm going to do some kind of saturated green and I'm going to eyeball it to my liking. Okay, we're using Breath of the Wild as an inspiration. It's okay to go ahead and just come up with our own colors. Okay, that's the sky. This is the horizon. This is actually pretty important. I'm going to go ahead and this is unorthodox for me, but I'm going to do that for the horizon just so I can see. Okay, that's my blue sky and that's my horizon. There's our color of our clouds. Any other colors? Oh, this is an important color. Stone. That's one that people forget about. They think that they're just going to use a variety of different grays and a variety of different browns. No. Pick
one stone color and stick to it. The color of our trees. Let's double check what Breath of the Wild does for their trees. Breath of the Wild has a different stone color than they do their trees. That that is actually important because a some games, including my own, stone and trees are kind of the same color, but in the case of Breath of the Wild, we've got some brown trees. something like a little bit of a There we go. This is our color scheme. If you haven't made games a lot, what I'm doing here seems meaningless to you potentially. This is the foundation. This right here is our foundation. I always like a pop of orange or something, but let's see what Breath of the Wild does. Yep, there it is. We have like a little pop of of of red reddish orange. That's good enough for me, man. That's our color scheme. I'm going to go ahead and save this really quick. Okay, so what what do we do with that, right? What do we do with that color palette? We're gonna start with our terrain and we're going to move slowly forward with all of our textures and we're going to start colorizing our textures. This one's good enough for me, man. Now, because we have this, we can use this. And I'm just matching it, eyeballing it
with the hue slider. This is rock solid. I'm going to merge it all down. Save it. Okay. So, let's go ahead and add this grass to our terrain. We're going to go to paint texture. We're going to add a new terrain layer. Create layer. We're going to type in grass. And there it is. All right. So, we got our grass here. Make sure it's saved. And there we go. We're not going to worry about tiling. We're not going to worry about normal maps. None of that. What other textures do we What might we need? Well, I know we're going to need rock. And we're going to want to use that rock to sort of blend in to the stone assets we're going to be using. So, if I put that one there, I want to be able to paint texture around it. So, I definitely know I want to use rock. We want to make sure we're matching it to our color palette. Now, if we take a look at Breath of the Wild, we want to double check the way their stones are. I think what makes Breath of the Wild so pretty is a lot of the rock has a a very bright white to it. Look at this. So, we shouldn't feel weird or guilty or strange about following this color for our color palette. So, we're going to brighten up that rock. Brighten it up a little bit. Good. Reduce the contrast. Good. Now, you notice it has some green in there,
right? And then also, it might need a little bit of a hue shift. So, I'm going to saturate it a little bit. There we go. But then what we're going to do is we're going to say, well, okay, but there's green in there. So, how do we match it to this green? Well, I'm going to copy that green over so I can see it. And all I'm going to do is I'm going to go to hue saturation. Add a new layer here. And I'm going to go to my uh yellows, the yellow channel. This should do it. Yeah, there it is. And we're just going to make it more green. Pretty good. Okay, we've got our stone there. Good. So, it can sort of pop through right here. See? But well, if we go to Breath of the Wild screenshots, you'll notice we've got some dirt here. So, gravel dirt. What I like to do so I don't go crazy is I like to only do about three textures, maybe four for my terrain. And then I just move forward and I start building a level. And if I find that I need more, I'll go in and add more. I kind of feel like our dirt should be the color of the bark. So, we're going to use this. And we're just going to put that here. There we go. Good. And I'm just going to shift the hue more towards the red. Desaturate it. There we go. I freaking told you. And
that's about all we're really going to need. That's really all we're going to need. So, we've got our textures for our terrain all colorized. The next thing I want to colorize is the skybox. You might think, "Well, that looks cool enough." Be careful. Stick to your color palette. Do I like this texture? Maybe. I feel like this one may look more like Breath of the Wild. I could be wrong here. Let's double check. That kind of feels like Breath of the Wild more. Yeah, Breath of the Wild has a very simple skybox. Obviously, it's got a nightday cycle. We're trying to replicate the first like 5 minutes of Breath of the Wild, though. That's what we're going to use. Okay. Oh my goodness. You can imagine why this is going to look so good. Look at that color palette coming through. That's good. Okay, y'all. Let's go ahead and start texturizing or colorizing our various assets. [music]
Let's throw in a wind component to see make sure that this wind even works. I wonder if it will. Okay, there's no wind currently. So, we're going to have to double check and see that this is the correct shader. Okay, perfect. All right. So, we have beautiful Breath of the Wild wind now. Amazing. And it will clean you, too, just like a car wash. That is great. That feels like Breath of the Wild. It's a little fast. It's perfect, baby. All right. And it works with the terrain, too, which is great. Pretty freaking unified. Not terrible. I think it's good enough for now. Let's get the stone coloring working. Those are matchy matchy. [sighs and gasps] Now, let's matchy matchy this. This one is a nice clean. I was hoping that this
was not some weird shader, but it is. Uh, let's go to universal render pipeline. Just set it to lit. Hopefully, it'll bring over all the different uh normal maps. Good. Okay, there we [music] go. Matchy matchy. So, matchy matchy. There we go. All right, those are unified. Everything's getting unified here, guys. So far so good. We're going to add normal maps and texturing to all of those. I'm trying to think what else we need to match. Oh, this one here. So, this is not technically we we need to create terrain grass. And then this is more of a detail grass that we could put into the terrain grass to make it feel like the terrain grass isn't really flat and boring. We need to create a paintable texture for for grass. So, what I'm going to do is actually take this grass here, and I could kind of bring it up a little bit like that. Add grass texture. I could go ahead and just find that grass terrain, this one right
here, and hit add. And now it should draw those. There we go. I'm going to edit it though, so that I can adjust the coloring and the size. We want to do a little bit of a noise spread. And you'll notice that it looks a little repetitive, right? One of the ways to avoid that is actually to make this look not so unique. So, the less unique you go with your with your grass texture, the better. Or I'm sorry, with your grass billboard. So, like this right here, I could do this. There we go. I'm going to make it look less unique. Almost like just like that. Yeah, it's pretty good. I I I think um we're going to enter play mode and take a look. Looks good. Now, you're probably wondering, you're like, "Okay, how do I make that look less repetitive?" Well, you could take uh you could take these and this right here and you could place these throughout. So far, it's looking pretty good. I'm actually really happy with it. For free assets, this is looking pretty good. And we haven't even sized stuff yet. None of that. So, I'm
really, really happy with it. I went ahead and sized all of my prefabs from yesterday. And I put them in a nice little folder here called prefabs. And look, I've got all of them. Now, look at this. I've got everything I need to place throughout my scene. Let's go ahead and paint our terrain. Okay, so I'm going to start with just a base layer of green. And in fact, let's figure out, this is something that I find really helpful. Find the game you're inspired by the most. So in this case, obviously Breath of the Wild, and find out, okay, what what's the main texture that you see most of the time? You see a lot of grass for sure, but I'm I'm I'm wondering if you see actually a lot more stone than you see grass. I'm going to go with stone. I'm going to say stone is our number one texture that's going to be used here. And then we're going to paint grass where it's flat. That's kind of the rule, right? We also have dirt, but I'm curious if we also need to create sand and snow. First one here, snow. Um maybe we have a dirt one as well. Let's double check here. And we have sand, but oddly enough, we don't have dirt. So, let's go ahead and just colorize this.
We're going to eyeball this one. We're going to use it fairly infrequently, but this is going to be like the color of a dirt path. Okay, I'm gonna eyeball that one and we'll figure out later if it's going to work for us. Do I already Where's my Wait, I have a dirt that there's dirt. I need sand. There we go. That's sand. Got it. Now, let's go ahead and add our terrain layers. Create layer. I'm going to create one called sand. And then I'm also going to create one called uh snow. The snow is super bright. We're going to adjust that in a sec. But we're going to start with a base layer of stone here. This base layer of stone. Whoops. No, we're good. We're good. We're going to fill in all of these terrain pieces. You'll notice I have 1 2 3 4 5 6 7 8 9. One terrain is probably not going to be enough. And so I created nine so that we can create some mountains around us. All right. So let's hit play and see if that texture that texture size is big enough for us. Okay, it's not. I think we need to go much bigger. That looks about right. But I'm wondering if we need to go over here. Okay, good. It updates all of them. Thank god. I'm going to assume
that grass is going to be 10 as well. In fact, because these all came from the same asset pack, it's highly likely that they're all going to be able to be tiled the same size. That's my theory. That looks good. I'm good with that. Um, so they're all going to look pretty good here. So, let's go ahead and just add stone here again. And now what we're going to do is we're going to study. Let's just let's just sit and study for a little bit how the terrain looks in Breath of the Wild. We're flanked around all sides by a large cliff. Now, obviously in Breath of the Wild, you have like a a moat, right, around you, and then you have the cliffs. We're just going to do big cliffs around us. That's all we're going to do. Um, let's hit play here. Looking good. Okay, let's smooth out the hills and stuff here. So, some of these hills are just a little too big.
Man, I can imagine how difficult. This is so interesting to me, how big Breath of the Wild truly is because I just added nine pieces of terrain and it's honestly not that big. Let's hit play and take a look. I could probably walk across this in like what, 5 minutes maybe. All right, let's go ahead and add some detailing here. Okay, so far so good. I don't hate it. And that's always a good thing, right? Look how big it is. That's crazy. Like way more distant. Now, we can create distance. Let's go ahead and do this. We're going to create distance by adding some fog. If I add on fog, it's going to make it look much further away, and that's a good thing. So, look, the fog in Breath of the Wild is that blue color of our sky that's more kind of up here almost. We're going to go a little bit darker. And then we're going to set it to be There we go. A little bit more saturated and a little bit brighter. There we go.
Brilliant. All right, let's hit play and and see if that helped us. Yeah, that did help us. Do you guys see why why fog is so valuable? All right, that helped us a lot. Let's go ahead and create some kind of portion of the level here in the middle. Something like this. waffles or pancakes? Waffles? Definitely waffles. That is a very good question. Very important question. I totally agree, guys. I'm going to duplicate this layer here for our stone. I want to show you something. If the stone is looking, and this is just like a really simple trick, it is not clever and it's not some shader. All we got to do is go to paint texture here. I'm going to call this stone. We have one called stone. I'm going to rename it to stone small. I'm duplicate it called stone big. And might as well just have snow big as well. Okay, why not? And this will be 20
by 20. And then stone big will be 20 x 20 as well. Okay. And now I could take this and I could paint on top of this. And you can see now it's sort of blending a little bit. And so the the trick here is to just go all over the place, especially towards the the um the bigger mountains over here. I'm going to go ahead and just do larger stone over there so it doesn't look so repetitive. But you can see here if you set the opacity lower and then do like a speckled texture, you can just sort of paint all over and it's not as repetitive looking. So now it's a mix. See? Yeah, that's great, man. Okay. Okay. The next thing I want to do is just go ahead and put some white snow on the peaks. That helps a lot actually. Yeah, that helps a lot. We're kind of going up in
layers. So, we're going okay stone then dirt then grass, right? So, what I'm going to do is go to my dirt and I'm going to start painting dirt where I think it would be. Grass will go here. We'll put grass [music] all over there. And I think, guys, I think that's all we need to do here. [music]
[music]
Looks pretty good. Okay, let's let's go to our assets. Remember we had prefabs here. Let's see if we can go ahead and do some stone work. I just want to play with the stones for a little bit. We have our
rocks here. And these rocks can sort of jut out of our terrain like this, especially where it's more matchy matchy. So, let's just go ahead and start placing our rocks. And you could go pretty big with these. So far so good. Okay, let's throw in some trees. Yeah, it looks much better in first person. And I think that's because we don't have a a third person controller yet. Okay, we need to add flowers, right? There's a lot of cool little effects we can add with flowers and stuff. I'm curious about the depth of field if that exists. I think it does in Breath of the Wild. And there's also a lens flare as well. Yeah, this skybox kind of sucks if I'm being honest. We're going to adjust this skybox to be a little bit more interesting. I tried to match it to to to the Breath of the Wild
one, but just not for me, man. This one is probably the coolest one. So, if I take that and I put it here and then I put it underneath all of this. Yeah, it matches. So, let's try that. I told you. Okay, we just need a little bit more stylized skybox. We're making an indie game here. And also, I'm seeing a color shift occurring when I enter play mode. Why is that? Because the camera doesn't have post-processing on it. That's why. There we go. Oh, man. It's going to look so much better. Thank god. But yeah, it looks so much better. There we go. It's like indie Breath of the Wild. That's exactly what we want. I'm gonna cheat here, guys. I'm going to create a horizon in the skybox. And I'm just going to have my skybox serve and create a little bit more depth cuz right now there's just not enough. The magic of indie gamedev. That is what we want. Let's start adding in some more assets. Remember we had the stones, right? Let's go ahead and throw in some of these. It's interesting what
happens when you start adding in some high a fewer higher fidelity assets. The brain will click and you'll go, "Oh, okay. So, this whole game is like high-res." What I mean by that is if I see this like that, my brain starts to go, "Okay, well, that's high-res and that's high-res and this is high-res." And that's just because some of the assets that I can get up close to have a higher fidelity. Looking good. Honestly, it looks great, man. All right. Looks good to me. Are there any other assets we're missing that we need to add? Oh, these big toughs of grass. Duh. Let's do that. We have a grass tuft that we can add just to make it feel a little bit more diverse. Put some here. You know, you can put them all over, especially near corners and stuff like this. We're just trying to create some variation in the grass, you know. And
then let's see if we can mess with the lighting a little bit for the directional light. Kind of like it. I think it's fine, but I do want to add a lens flare to it. Let's add a lens flare to our lighting. The way we do that is we just go to lens flare. Uh, we need to do lens flare srp. Mhm. And the question is where? There it is. Okay, good. It's right there, baby. So, the lens flare is already occurring. We can increase the intensity of it if we want. Here we go. There it is. Right there is cool. That's awesome. So, we have more of an evening glow here. Crank up the intensity. Yeah, that looks great. Screen space occlusion, of course. There we go. And we're going to put a sun in the sky box, y'all. There we go. Man, that's great. I know that's a little intense and it looks more a little bit like Wind Waker than it would be Breath of the Wild, but I like it. I
kind of prefer it. It's very beautiful. Okay, you guys ready to add some fog and some music and some sound? The fog is as simple as adding a particle, a particle system like this, giving it a shape of a sphere, having it not move at all. Well, I guess we could have it move in one direction, but I'm going to set the start speed to zero. And we're going to increase the size of the shape here. The radius is like this. The max size 10 to 20. Set the alpha to be really low. And then we're going to do color over lifetime. Alpha to zero. Alpha to zero. And all it's going to do is fade in and out. See, we want to make sure it doesn't shrink when the camera gets close. So, we need to go down to the renderer and set the max particle size to be pretty big. 50. Minimum particle size 20 or 10 or five or eight or one. [laughter] I'm gonna have them move a little bit. So, we're gonna go force over lifetime. You you just attach it to the to the camera and it'll always follow the player around. So, we're going to do -10. There we go. Brilliant. Okay. I'm going to remove the
capsule collider entirely. So, we move around and it is third person, but we just can't see the capsule collider cuz I want to be able to explore this world without that ugly capsule collider in here. All right, good enough for me. I think we could probably decrease the the particle system opacity. And then what we can do here is go ahead and throw on some ambience. So, all I'm going to do is go to artless.io. Let's find in some summer field ambience. I like that. And then we're going to find some beautiful piano music. Soft piano. Maybe even type ambient. We'll see. ambient. [music] There we go.
It's something like that, right? You're never I There's something about the music in Zelda that is in in Breath of the Wild that is so perfect and I cannot put a finger on it. Hey, for two Well, how many hours was that? It was 3 hours today and it was like an hour and a half yesterday. Maybe 2 hours. That's not bad.
Auto-generated captions from YouTube — names and numbers may be misheard.
Key insights
Distilling the key insights…
Ask AI about this video
Cite this video
Citation
Generating citation…














Comments