Transcript
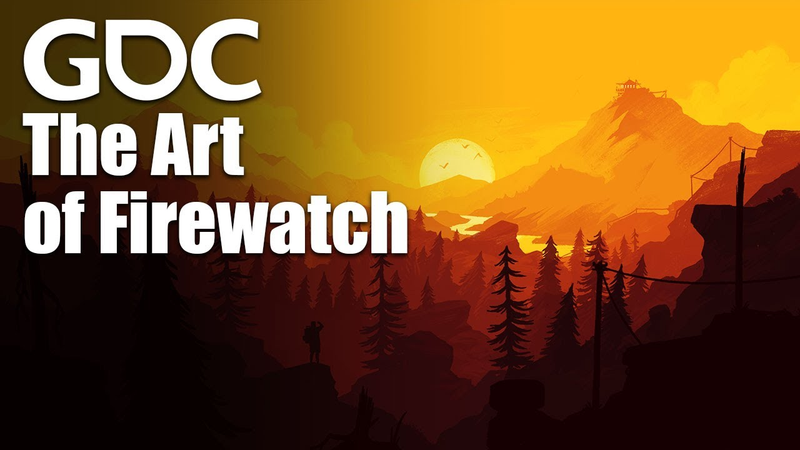
All right, so I wanted to figure out the Firewatch look. I've always loved Firewatch, but I wanted to do it live all in one sitting. I think I did this in like 4 to 5 hours, but several hours were me trying to solve shader glitches and stuff. But this is all free assets, okay? All of this is free and legal assets, [music] and all of the links are below to every single asset. I wanted to show you guys you don't need to spend a lot of money, you don't need to spend a ton of time to get, well, a beautiful look like Firewatch. So, let's go ahead and jump in and get started. This is the style we're going for today for this Firewatch look. The first thing we're going to start with is the color palette. This is kind of the color palette I want to do. And so, just like a Bob Ross painting, what we're going to do is we're going to say, "Okay, we have our swatches and we're going to stick to these swatches." And we're going to try and translate these swatches into all the free assets we're going to use, okay? Now, what I want to do is I want to make sure that our textures are proper properly stylized. So, we're going to take all of the assets we've got here and make sure all the textures look good. You'll notice that a lot of these assets in our project hierarchy,
it's it's not a mess. A lot of people when they use assets in their project, the whole project is a freaking mess. You've got like 12 20 different folders of all these assets. 70% of those assets you're not even going to use. So, what I did this morning before I started the live stream is I I downloaded all the assets that are linked below. But what I did was two things. I converted them into the the file that I want to use, a non-destructive file. So, I don't want PNGs, I don't want TGAs, I don't want FBXs, and those are 3D files. I want blend files and I want Photoshop files. And the reason why is so that I could quickly iterate. I want to be able to open up that tree in Blender by double-clicking on it, make a change, save it, and it it updates in Unity. The same is true with Photoshop files as opposed to PNGs. I don't want to have to constantly export my PNGs, which basically every asset I've ever downloaded has a PNG for the texture, right? So, I want to update those PSDs instantly and quickly. So, I had to go through, and this is this took a while. I had to go through all of the assets
that I downloaded, and I picked the ones I liked, and I converted them to the proper format so that I can quickly iterate, and then I deleted everything else. So, it's nice and clean. So, what we want to do here is let's go ahead and start making sure our textures look good. So, I want to stylize certain textures. This is probably going to need to be stylized, but I think the stones we don't need to stylize those. The grass we don't really need to stylize. That foliage we need to stylize. So, all I really want to do, and also I've got these textures here, these are all stylized as well. Like this stone here, all of it's stylized. So, I don't need to stylize anything else except for the trees. So, what I'm going to do is stylize just this texture here. So, what I'm going to do with this is duplicate that layer, go to filter, and go to stylize, we're going to do oil paint. Really straightforward here. And then I'm going to do a smart blur. Let's see here. There we go. Yep. Now it has this sort of stylized look. All I needed to do was an oil paint filter and then a smart blur. And now it looks hand-painted. It's I mean, seriously, it
was that easy. I'm going to hit save here, and it should automatically re-import into Unity, and now we have this more stylized look. And honestly, if you really really wanted to, you could have a stylization standard of filters that you're using, and you can go, "Okay, well, I want to I want to do them for everything." So, let's say I didn't like this look. I could just say, "Well, let's just go ahead and do that same thing, you know? Let's do the oil paint stylization, right? And then let's also do the smart blur." And now we have that sort of standard that makes this stylized look across the board for all textures. Now, the problem with doing filters like this is that oftentimes you get tiling issues. And if you do get tiling issues, in my previous videos I've talked about this, you can flip horizontal and then fade the edge just like this, and then you merge those together, and then you flip it vertical and do do that fade again. And you'll get seamless fades on the sides. So, overall, I feel pretty good about it. I don't think there's any other textures I need to adjust. Let's see the fern here. Uh the fern we need to do that one as well, okay? So, I'm going to go to the fern, and that looks awesome. I love that. Okay, let's go ahead and just make sure we fix these textures really quick.
I'm sorry, these materials. What we want to do is we want to make sure that we set it to transparent, and we're going to do two-sided, and not preserve specular cuz you're getting all that specular information on the transparent pixels. You also want to make sure you go to your PSD file in Unity, and make sure you set albedo is transparency to true and remove PSD map hit apply. We're going to turn down the smoothness. And let's see if we can change to opaque and that'll fix it. We're getting some weird alpha issues. I think that'll do. Is that Is that fix it? It does fix it. Good. Okay, there we go. All right. And then the same is true with this one here. I also downloaded the first-person character controller. This character controller is free, and it's in the link in the description. So, if we hit play here, we can just take a look at what we've got so far. That's about it. Nothing crazy. I'm going to remove all the specular information from those rocks. We don't want any specular on anything really. There we go. Get rid of specular. Now it just looks a little bit more toon shaded. Okay, so I think we can go ahead and start colorizing, but let's make sure we throw on Also, by the way, there's there's post-processing that's turned on by default in Unity.
I'm going to turn that off just to be sure so we can see things clearly. Uh let's go to our lighting, and let's throw in the skybox that I downloaded as well. Now, again, you're going to notice I don't have any other skyboxes that were downloaded with a pack. Even though I I downloaded a pack of like five or six of them, I've deleted all of them except the one I want. So, I'm going to go ahead and jump into our skybox. This is the first thing I want to do. It's kind of like Bob Ross paintings. And with Bob Ross, you start with the sky and you move forward towards the camera. That's what I like to do with my scenes. I start with the skybox, make sure I like its color, and then I move and move forward, move forward, move forward, move forward. So, again, we've talked about this in previous live streams. What I want to do is I want to take this sky color here. I'm just going to paste it in here, and I'm going to slowly start matching this sky color to that. And I'm going to trust the color palette that I chose. That's good, and let's see this here. Yep. So, on average, we're we're basically hitting that color. Good. Awesome. Let's start with the grass. The grass is the yellow color. It's not the
green, it's actually the yellow. So, let's just go here. I'm going to paste that color here so I can eyeball it. I'm going to save that, and you can see that it's slowly starting to change. It's starting to feel more stylized. Let's go to our fern here.
[music]
I'm telling you we are getting so close already to the Firewatch look. Okay, guys, I think we got all of our textures color I Oh, we got to do the stone, okay? The stone is great because it's one texture, thank god. Now, there's certain assets There's certain assets where I'm totally fine using a normal map, especially ones that are going to be really big. So, these stones are going to be massive. I'm going to make huge stone mountains. I'm okay using a normal map because that normal map is going to kind of replicate a
stylized mesh. Anyway, let's go ahead and get the color here. There we go. That's good, man. Let's take a look. Yep. Brilliant. Um okay, I wanted to mention these boxes here because we're going to move into scaling up our objects. This is a This is a a common mistake that a lot of game devs make. They assume that their their subconscious or their their eye can determine scale properly. And so, they'll just scale things up willy-nilly. They won't think about a standard. Our standard is this primitive cube, and this is the case for all of my games. This the cube is the primitive cube is my standard. Now, relative to a human, how big is a primitive cube? Does anyone know? What's the general rule? A primitive cube should be half of the height of the character controller. And lo and behold, what do you see here? This character controller I downloaded, which was free and it's highly rated, is literally two times to a T two times the height of a primitive cube. So, I've got two cubes here. I've got the primitive, and then I've got this one, which is multiplied times two in the Y, because
this is my character height. So, this helps you. This helps you go, "Okay, well, how big should a tree be?" Well, if I move the primitive cube over there, does that seem like a good height for a tree? That's half the player height. Okay, I can move the this one over. That's the player standing tall. Imagine the real world, guys. That actually kind of looks a little small to me. I feel like a pine tree is much bigger than that. This one, I feel like this is a pretty good standard size. So, I'm going to hit apply all. This uh pine tree here, okay, I'm going to again, I'm going to move this over so that I can see it. I hate that I can click on that terrain. That's probably a good size. I'm going to hit apply all, and we're going to place some around, and we're just going to feel it out. That feels pretty good, doesn't it? And they're not even rotated, and the scale will be varied. That looks good. Awesome. Honestly, that looks good. All right, but let's go ahead and talk about the standard scale of our stones. Well, you got to think think be thinking about, "Okay, what's the use case for these rocks? Is the use case tiny pebbles, or is it big boulders?" Especially if we're going to be in Boulder, Colorado. Well, let's take a
look here. What is What is Firewatch doing? Pretty big. Maybe half the height of the player. What about this? Okay, some of them are about the size of half the the height of the player. Some of them are like the size of maybe your legs. Some of them are are the size of like three of the player. So, I think a good sort of average size is the height of the player. I think that's a good average size. So, I drag it next to these guys, and now I'm just going to scale it up so that it matches the height of the player. Now, does that mean I can't adjust the size of the rocks? No, no, no. We We want to be able to adjust the height of our rocks. And And really, in fact, rocks are one of the one of the things I I I create crazy variations in size. The trees, not so much, but the rocks, we're going to go super big, you know, like 10 times this big, especially in the distance. And then other ones we're going to do like maybe even smaller than this. Okay, so those are the great size for all of our rocks. I'm going to go ahead and apply all of this to all the prefabs so that I can just drag and drop these. Let's get our our our bushes to be the right height. Man, do we really want it to be the size of the player? Probably not. Probably not. So, let's
shrink it a little bit here, and I think that's pretty good. But, let's hit play and just double-check everything. Yeah, this is great, man. All right, we're we we're missing one major thing, and that is paintable grass. This one's a big one. This is going to make this all work. So, what I'm going to do is I'm going to go to right here, paint details. I'm going to create a new brush, and I'm going to type in grass here. I should have it. Yep, I have it. Something called grass billboard. This is not an asset. I created this in Photoshop, and it looks like crap. Nope, that's the wrong one. Sorry, I added the wrong brush. Give me a sec here. It's not a brush. All it is is a texture 2D, grass billboard. Add, and then I can just paint this all over the place. There it is. Looks amazing, doesn't it? Wow, it looks horrible, right? But, we want to get this perfect so that we can use it all over the place. I'm going to edit this the PSD. I'm going to edit the PSD, and we're going to make this look like Firewatch. All it's going to be is white, okay? And then we can adjust the colorization of it in Unity. So, something like this kind of helps. Yeah, it looks pretty
good. If you can notice it's sort of shooting out like that. So, because because I want to use all legal assets, you could probably find some stuff on the asset store, but what I'm going to do is just show you guys how you can do it in Photoshop here. Um I can create a simple circle like this, move the selection over, and do this. So, there's our grass blade. I'm going to convert it to a smart object, and my theory is we should be able to use this single piece here to create some grass. We flip horizontal, and just sort of play around here and get it looking perfectly. The thing about it is you don't want it to look too unique, because if it looks too unique, it'll actually look repetitive, oddly enough. And we can't use um I don't believe we can use transparent pixels, like faded pixels. I think this is all we can do here is opaque pixels. Okay, let's just save that and take a look. There we go. Okay. All right. Not bad, not bad. Let's go ahead and make them white. So, I'm just going to group them all together, save it, and
take a look. And then I can change the color in Unity. Let's go to edit details. So, what you want to do when you're selecting your color is the healthy color and the dry color, I'm going to make sure those are the exact hue in Photoshop. I'm not going to select from the from the Unity screen because you have lighting data, fog data, shadows. We want the raw basic hue. So, this one right here. So, this is our dry color, I'm sorry, our healthy color. And we're just going to do the the same for the dry color. Now, we could create maybe a little bit of a of a a shift, maybe like go a little bit more red, maybe, or more green. I'm I'm cool with this and maybe just darken it a little bit. Cuz you kind of want it to blend into the grass below it. Honestly, that doesn't look bad. Um I think they're probably a little too big, especially if you could remember, this is why it's so important with size, guys. My brain is telling me when I see this, my brain is going, "Yeah, this looks fine." But, then I got to go, "Wait, hold on. This is the size of the player." So, that grass is as tall as the player. We don't want that. So, what we're going to do is go to our max height, set it to one, and then the minimum height 0.5. Same is
true with the width. There we go. Let's hit apply here, take a look. Okay, good. I'm going to go to target strength, make it full. Okay, now that we've got our grass, you can see why it's so important. But, the problem is is that it's very flat. So, let's go to edit details, and we're going to try and create some uh noise. Um I'm sorry, some some height uh variations. So, we're going to go 0.1 for height, and then point Let's do 0.2 for both, actually. So, we get a nice random height adjustment. There you go. You can see it sort of creating a kind of a a hillish effect. Honestly, I don't hate it. Let's hit play. Okay, but this looks amazing, guys. So far, so good, honestly. Grass looks good. It's blowing in the wind. Um I think we're ready to paint. All right, so we've got all of our assets. All of the assets are applied in terms of the the prefabs are are ready to go. I'm going to go ahead and add these trees to be paintable in the terrain. So, I'm going to add a tree, and here are our trees. I'm going to make sure I drag in the right one. There it is, pine 1A and pine 2A. Okay,
there we go, guys. So, we got our trees ready to paint. Are we going to paint rocks? No, we're not going to paint rocks. We're going to place those um strategically. All right, I don't really need these sizing objects anymore, these measuring devices. So, we're going to get rid of those. Let's go ahead and go to our paint texture. We're just going to make sure this is all grass, and we're going to start raising up the terrain. Looks pretty freaking good, honestly. Nice and stylized. So far, so good. I could probably put some grass up here. Cool. And so, it feels like a desert, doesn't it? And we're going to have to use we're going to be clever with our skybox and also some tree billboards to create this feeling of being in a giant forest. But, overall, this looks great. Feels good to me. Let's move forward with adding in the grass.
And remember we had all these rocks, right? Um let's start placing those.
[music]
All right, let's go ahead and add the fog really quick. The fog in Firewatch is like a green fog, and I'm fine eyeballing this. Yep. So, that actually helps it a lot. Already. I desaturated a little bit or make it a little bit more blue. But, that's great. 0.01 exponential density. That's good. And then let's add some trees. Uh what we don't want is too many trees in the distance. There's kind of so many meshes. We're going to need to create some kind of a a billboard. For now, what we can do is just put some trees on
the terrain near us using a single point like this. Now, let's enter play mode, just feel it out. If it feels pretty good, we're going to move on to we're going to move on to the skybox and then post-processing and all that good stuff. That feels a little weird right there. I might put a little stone there. Yeah, we can put mountains in the skybox, and it'll feel like we're just flanked by the rocky mountains or something. But, overall, pretty good for for 3 hours.
[snorts]
All right, let's add a mountain to the skybox. I'm going to create one single mountain using the pen tool. Hold alt. Pull like this. We're going to fill it. That's all we need.
Honestly, for like this whole thing. I just create a bunch of shapes here of mountains, and we'll silhouette them, and yeah. Just give me just a sec. I promise it'll make sense. Merge these layers together. We're going to make sure that this is not too big. It probably is. If we move them up here, you'll see. Yeah, I'd probably shrink them a little bit. Let's try that. Pretty good size. Here we go. Color overlay, we're going to do a simple color overlay of that bluish color, like that. Maybe a little bit darker. There we go. And then I'm going to put in front of it another layer, duplicate, flip horizontal, color overlay a little bit darker, and then one more, transform. We're going to flip horizontal, shift to like here, and then do another layer here. And that's our skybox. It should work. Let's take a look. Yeah. Do you can you see it here, you know? Kind of. Yeah, we're just nestled so low that you might need to move it up here. Yeah. Yeah. Yeah. Here we go. That looks amazing.
Pretty good. That looks good. Oh, I wanted to show you something. I mean, I could show you guys how to do a pine tree really quick. Um the way pine trees work is they're triangles, obviously. And because we want to use only free stuff, I'm not going to grab any silhouetted pine trees from anywhere, and I'm just going to do this. If I all I need is this right here. It's all I need. And then I can just do this. You scale it up, and they basically double in size for each layer. Convert to smart object, and we're just going to do subtle trees, little groups. So, these little groups are just going to be little pops of trees sticking out in the distance, and it's going to make things feel so deep and rich. Uh we've talked about this a million times, but a lot of indie games, because they have no depth a lot of games have indie games have no depth, and it always feels like there's just this boring desert. You want it to feel rich and full and deep. Yeah, there we go. Very subtle. I think it works. I want to go into the skybox here, and I want to create a a sun. I think this is going to make every all the difference, guys.
Right here, that's sort of hanging high in the sky. We can even make it look a little bit stylized. Do that. You blur it a little bit. That. And then this will make a big difference, by the way. Here we go. Sun hanging high in the sky, baby. He's right there. I want to be able to see him right there. So, what we do is we make him a smart object, and then we squash him and move him to like right here. And then we're going to rotate the skybox. There we go. Um bushes. We forgot bushes. Sweet. There we go. Oh, what did I say? We're missing another thing. Oh, wind. Oh man, that's beautiful. We're going to apply it to that as well. See, it's really important that you have the wind because seeing shadows cast like that really helps. And I like how it's just doing it to the leaves. I don't even know how that works. All right, let's go ahead and throw in some sound effects. The way I like to do sound is I like it to be subtle and crispy forest ambience. And you just want it to be
[screaming]
Let's just download that. That's good enough. I'm going to paste this into my project and we're just going to type in or put that there. Now, we don't have any footprints out footsteps sounds in this video, which is okay. All right, so let's play it in full screen. So, what do we think, guys? Did we accomplish our goal of getting the Firewatch look? We need a river. Okay, let's grab some water.
All right, guys. That's it. I love it.
Auto-generated captions from YouTube — names and numbers may be misheard.
Key insights
Distilling the key insights…
Ask AI about this video
Cite this video
Citation
Generating citation…











Comments